
A multi-parcel shipment is one order sent in two or more physical parcels. Each parcel can have its own weight, dimensions, contents, tracking number and shipping label.
Available methods #
- Web interface: create and check parcels directly in an order. This method is explained below.
- Excel import: create parcel data in bulk when importing orders.
- API or web service: create parcels automatically from an external system.
Before you begin #
- Make sure the order and its product quantities are correct.
- Confirm that the selected carrier service supports multi-parcel shipments.
- Prepare the weight and dimensions of every physical parcel.
- Complete the parcel structure before generating labels whenever possible.
Create parcels in the web interface #
Step 1 — Open the Parcels tab #
Open the order, then select Parcels. The table shows one row for each parcel, including its customer reference, status, weight, tracking number and shipping date.
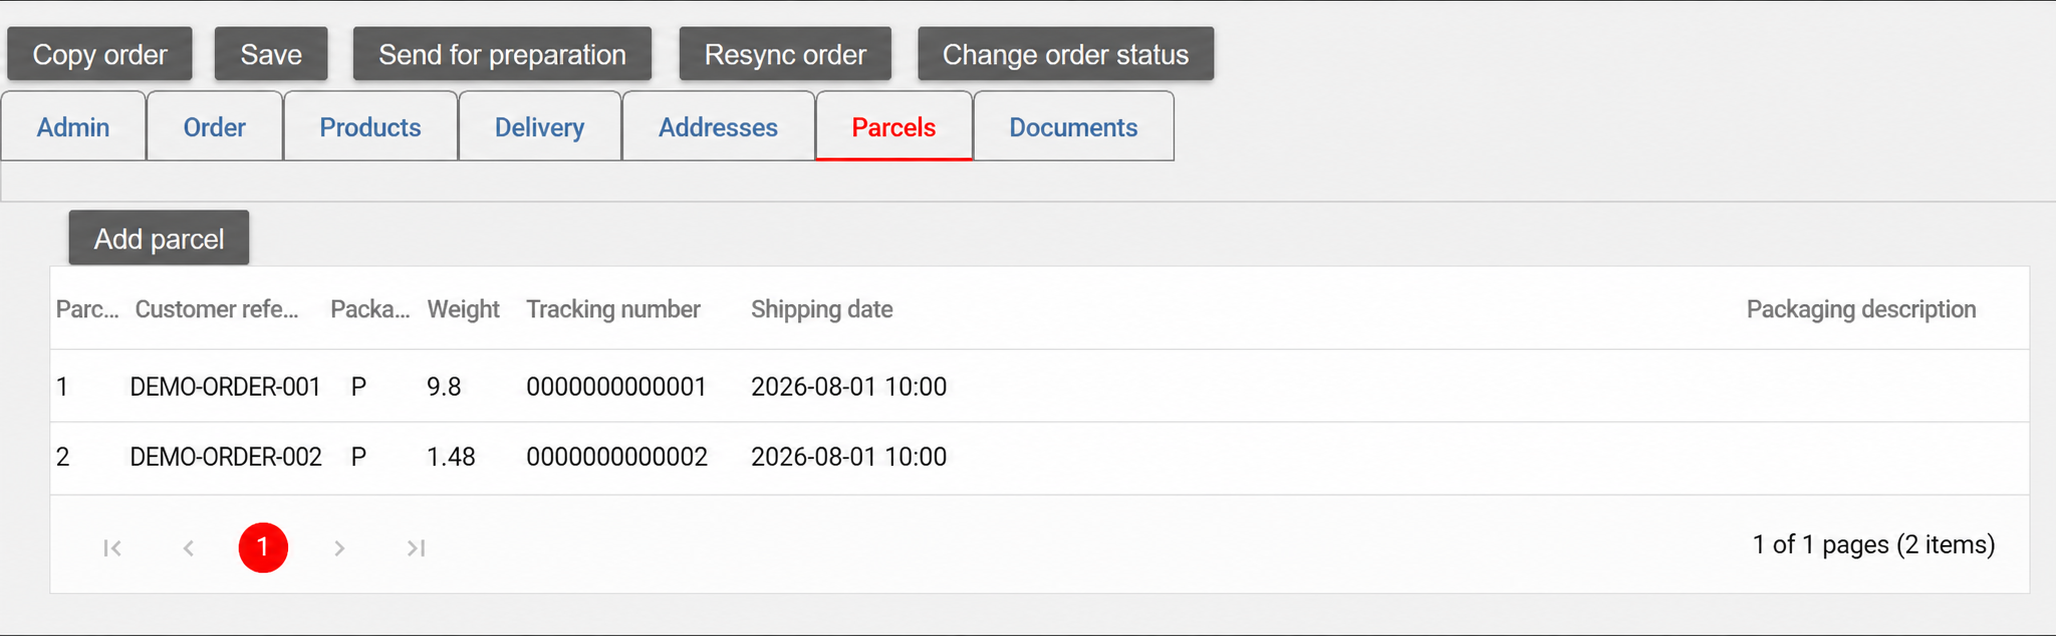
Select Add parcel to create another parcel. To review an existing parcel, open its row from the list.
Step 2 — Complete the parcel information #
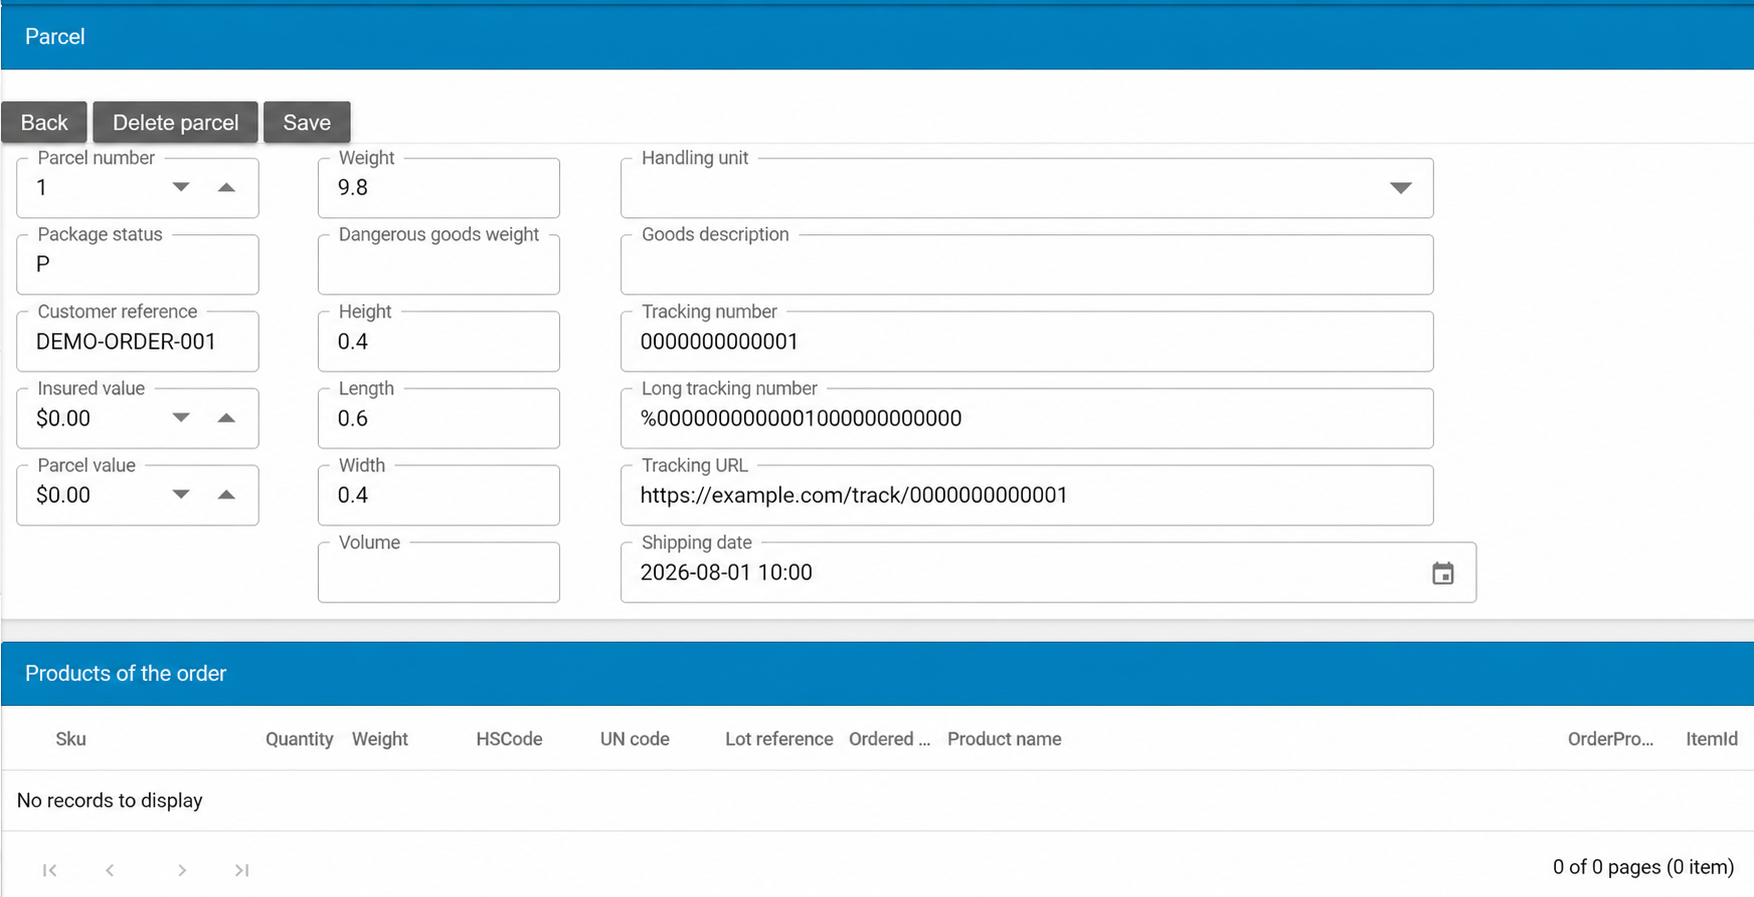
Enter the physical and operational information for the parcel, then select Save.
- Parcel number: the sequence number within the order, such as 1, 2 or 3.
- Package status: the parcel’s current workflow status. Keep the default value unless your process requires another status.
- Customer reference: an optional parcel reference. If it is empty, AtomicSeller may use the order reference.
- Weight, height, length and width: the parcel’s shipping measurements. Use the units configured for your account and carrier.
- Handling unit: the packaging or handling type when required by the carrier.
- Goods description: a clear description of the contents when required for transport or customs.
- Dangerous goods weight: complete this only when the parcel contains regulated goods and the selected service supports them.
- Insured value and parcel value: the declared financial values used by the selected service.
- Tracking number, long tracking number and tracking URL: these are normally returned by the carrier after label generation. Do not overwrite them unless you are correcting confirmed carrier data.
- Shipping date: the planned or confirmed shipping date for this parcel.
Step 3 — Assign products to the parcel #
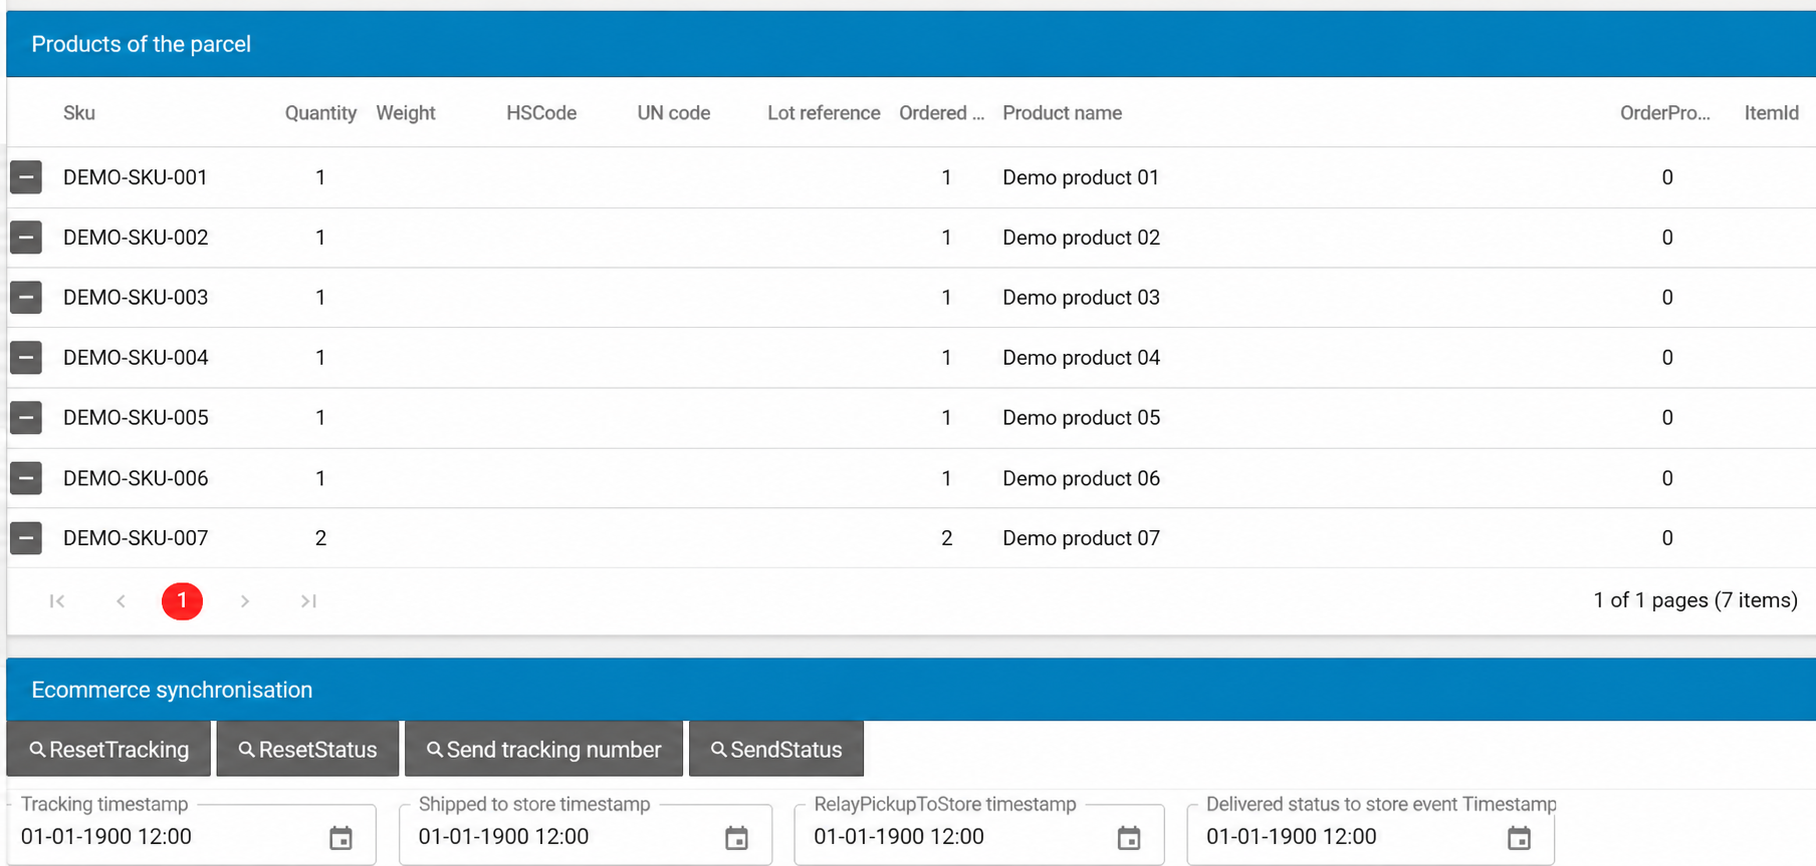
The parcel page separates products that are still available in the order from products already assigned to the parcel. Use the controls at the left of each row to add or remove products, depending on the table displayed.
Check quantities carefully: the total quantity assigned across all parcels must match the quantity in the order. A product can be split between parcels when the ordered quantity is greater than one.
Step 4 — Save and check every parcel #
Save the parcel, return to the Parcels tab and repeat the process for each physical box. Before generating labels, confirm that:
- there is one parcel row for every physical package;
- weights and dimensions are correct;
- all products and quantities are assigned once;
- each parcel is in a status that is eligible for label generation.
Generate the parcel labels #
Open the order’s Documents tab and select Generate label. AtomicSeller creates the shipping documents for all eligible parcels. Each parcel receives its own document and tracking number.
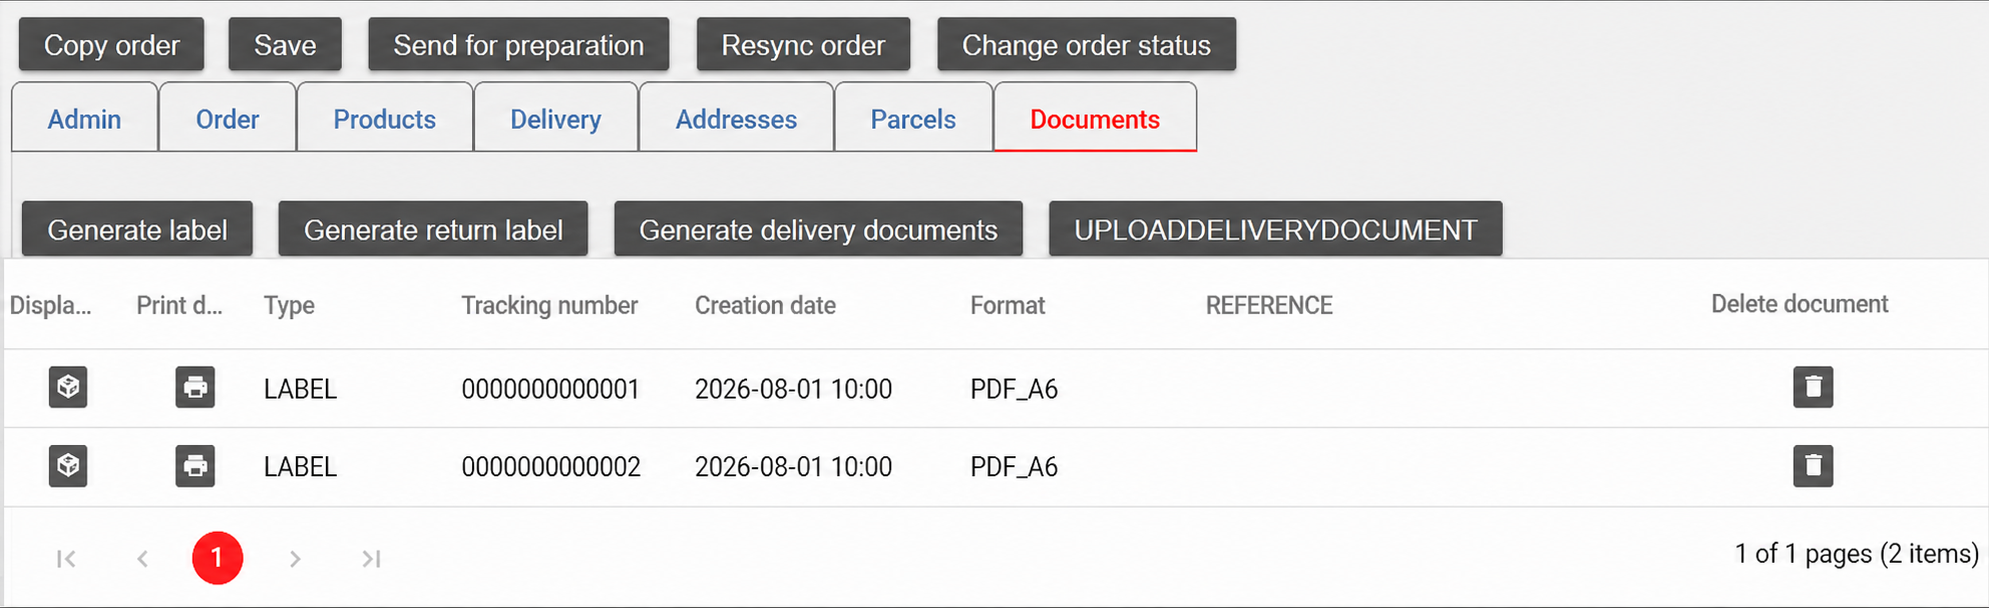
Important: if you change the parcel structure after labels have been generated, the affected labels may need to be cancelled and generated again. Always check the carrier documents and tracking numbers before dispatch.
Create parcels with an Excel import #
- Add the parcel data to the order file using the package fields described in the Excel Orders file format guide.
- Import the completed Excel file into AtomicSeller.
- Open the order and check every parcel in the Parcels tab.
- Generate the parcel labels only after the imported data has been verified.
API and web-service creation #
An external order-management or warehouse system can also create the parcel structure through AtomicSeller’s integration services. Send a stable parcel reference, measurements and product allocation for each parcel, then verify the resulting order in the web interface before generating labels.